
The latest update to GDS 2 in Techline Connect provides technicians with the ability to build personalized data parameter lists tailored for specific diagnostic sessions — identifying only the data points relevant to the current vehicle concern. Custom data lists can be created using specific parameters across multiple control modules, resulting in a single list that is easy to analyze. These lists also can be saved for future use and may work on multiple vehicles, depending on individual model support.
Here are some tips for selecting specific parameters to create custom data lists.
Accessing Functionality
The custom data list functionality is accessible in every module’s data list (Identification Information, Data Display). Launch the custom data list feature by selecting the Create Data List button at the bottom of the screen. (Fig. 1)

Fig. 1
Filter Parameters
There are several ways to find the parameters needed for a custom data list. A parameter name can be entered directly into the search bar, or the available parameters can be filtered by name (Fig. 2) or tag (identifies pre-defined parameter groups). (Fig. 3) Parameters also can be sorted by control module. Use the Clear All Filters button to reset the filters.
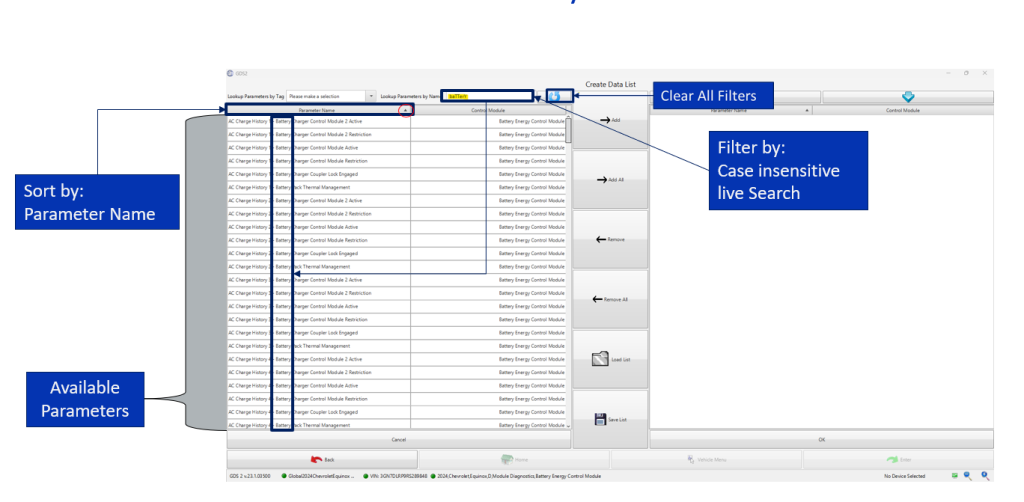
Fig. 2
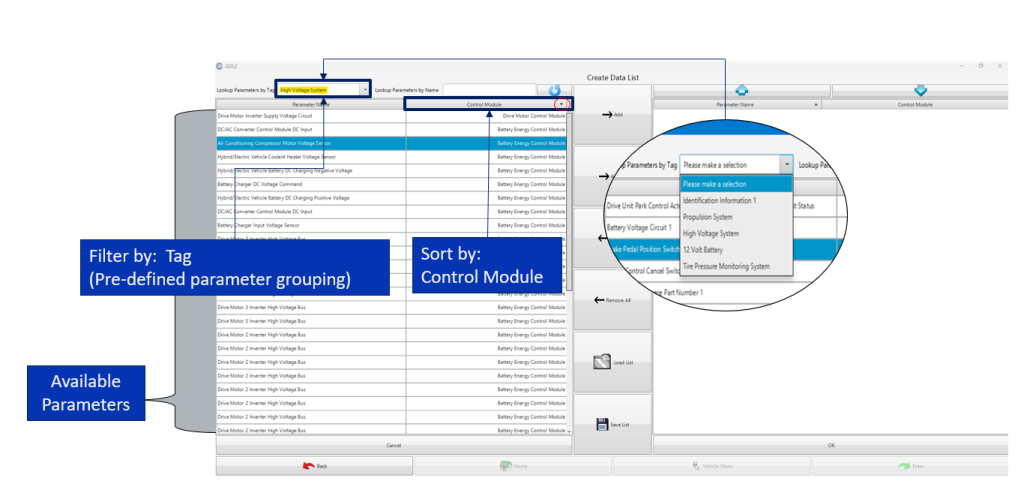
Fig. 3
Adding Parameters
Individual or multiple parameters may be selected for a custom data list. Select a parameter (Fig. 4) or several parameters from the list in the left panel and click the Add button. To add all parameters, click the Add All button.
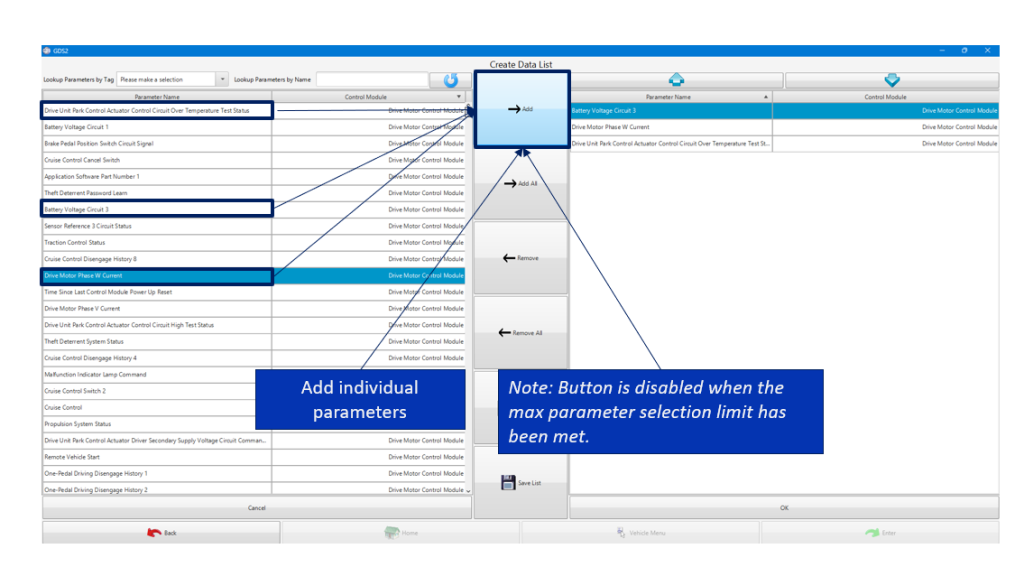
Fig. 4
The Add and Add All buttons (Fig. 5) will be disabled when the available parameter count exceeds the maximum parameter selection limit.
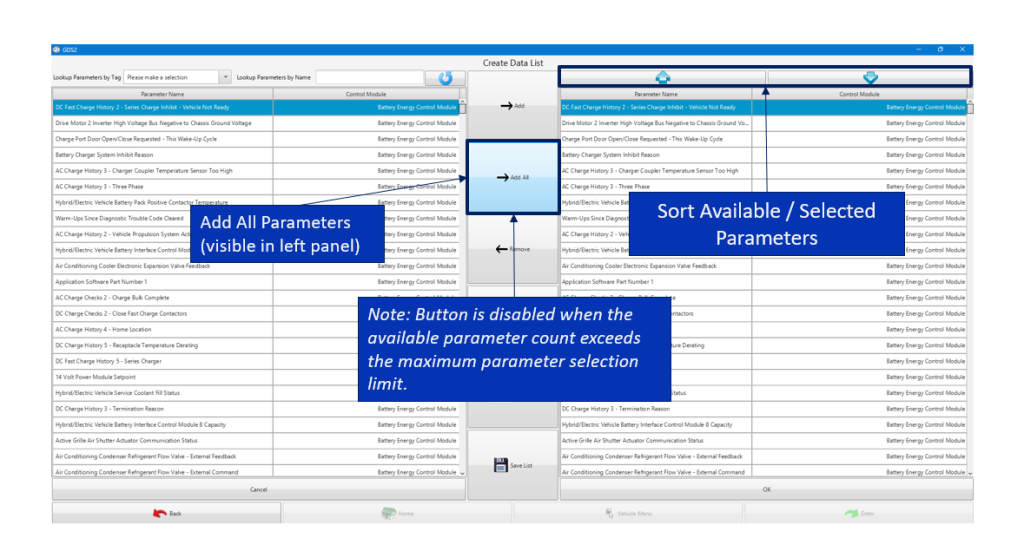
Fig. 5
The new custom data list is shown in the right panel. The data list can be sorted by name or control module.
Modifying Parameters
The custom data list can be modified after being created. Remove a parameter by selecting the individual parameter and clicking the Remove button. (Fig. 6) Click the Remove All button to remove all parameters from the list.
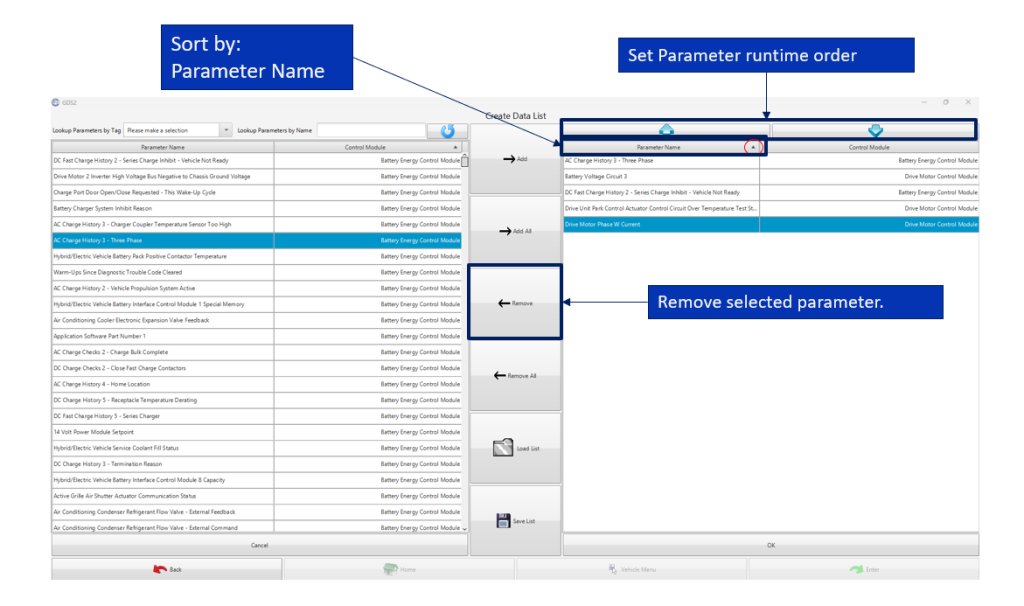
Fig. 6
The parameter runtime order can be changed using the arrow buttons at the top of the data list in the right panel. (Fig. 7)
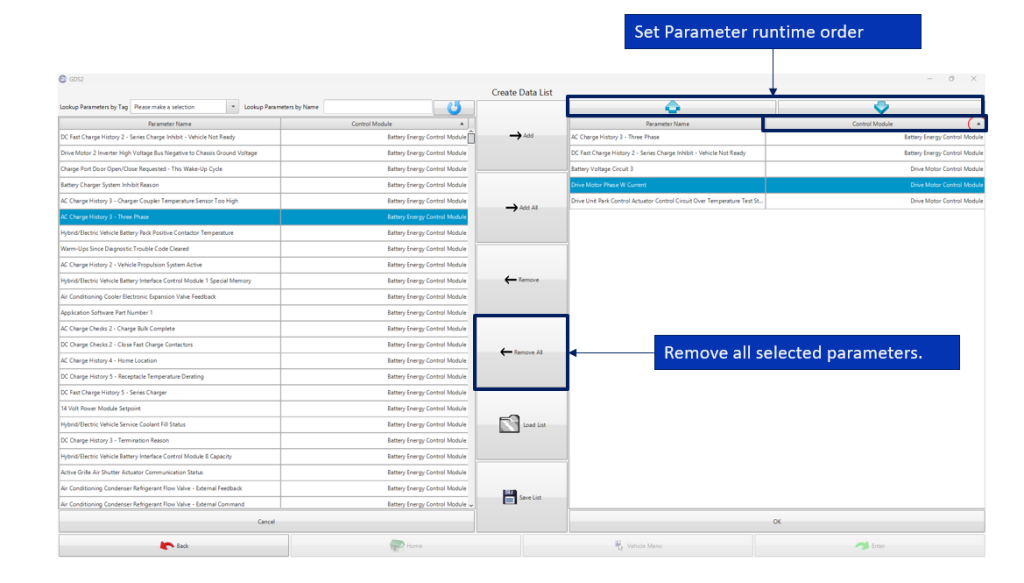
Fig. 7
Launch Data List
Once the data list is created and modifications are complete, click the OK button at the bottom of the right panel to launch the custom data list. (Fig. 8)
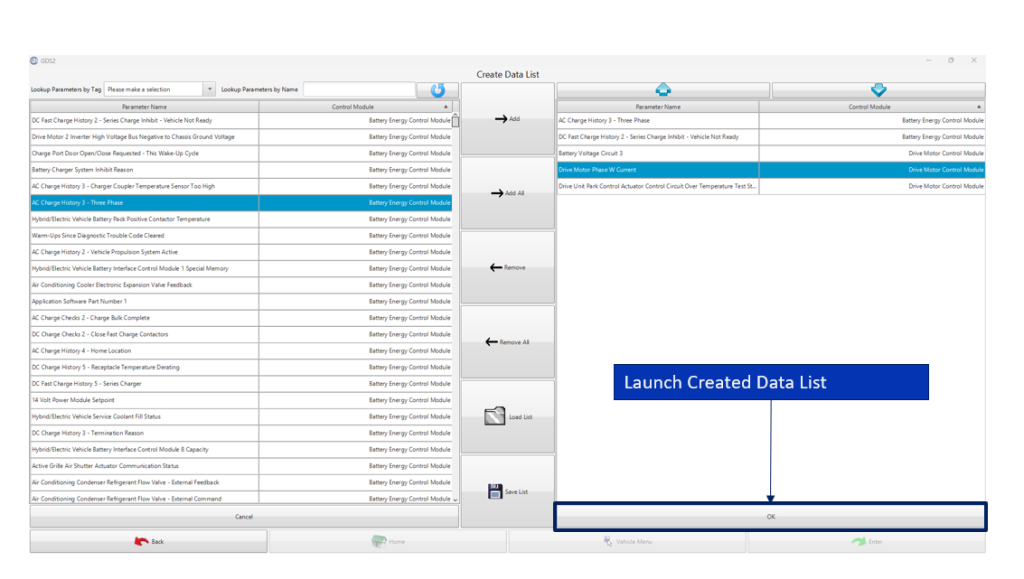
Fig. 8
Once launched, the custom data list will be displayed with the selected parameters. The data list can be named using the name field at the top of the screen. (Fig. 9)
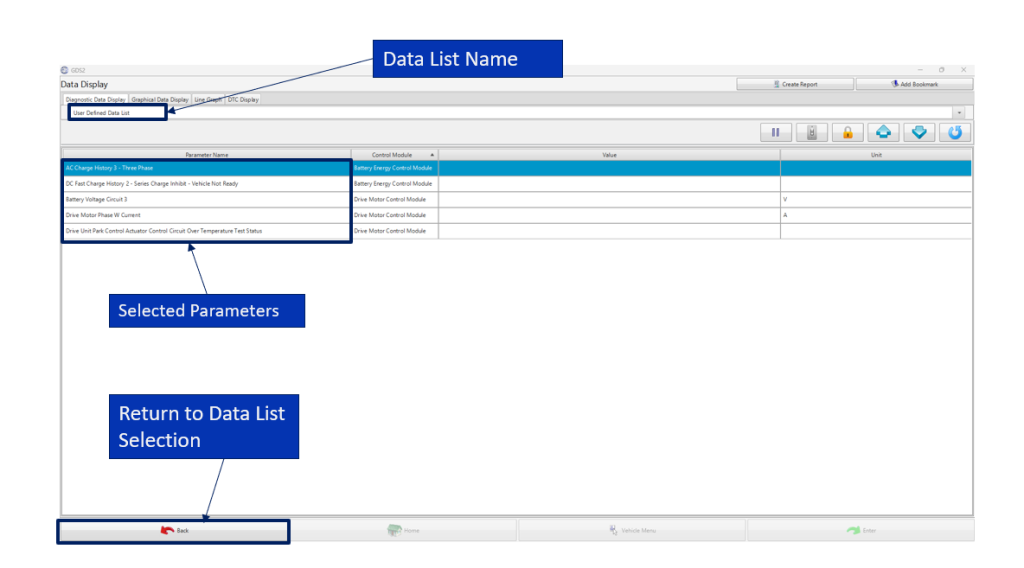
Fig. 9
Select the Back button to return to the data list selection page. The new custom data list will be displayed along with the pre-created data lists so it can be used for future diagnostics. Runtime data is saved automatically after selecting the Back button. (Fig. 10)
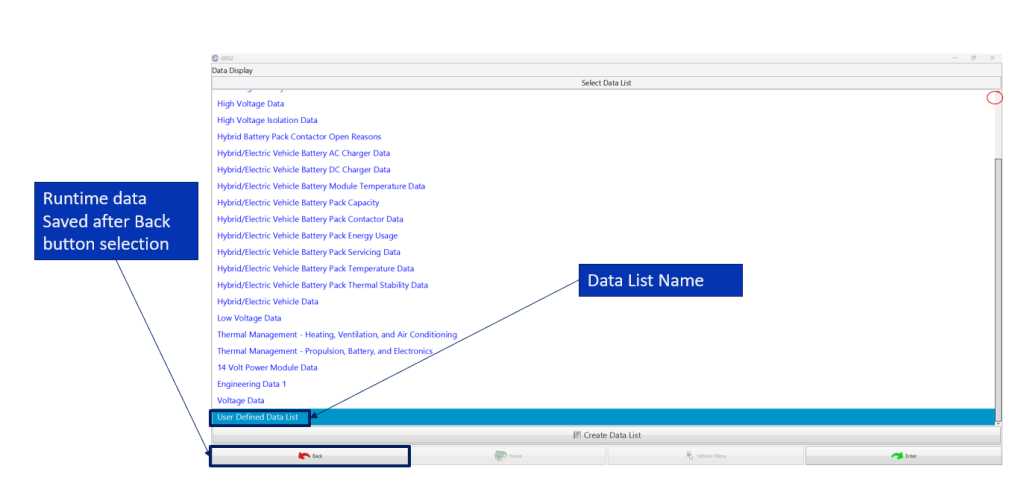
Fig. 10
If you have questions about custom data lists, contact the Techline Customer Support Center (TCSC) at 1-800-828-6860.
– Thanks to Chris Henley


