
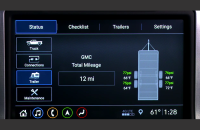
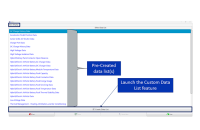
With the MDI Manager application software, the MDI 2 can be configured to communicate with a PC using several possible networks, such as a USB cable, ethernet cable, Wireless Local Area Network (WLAN), or Point-to-Point wireless. (Fig. 1)
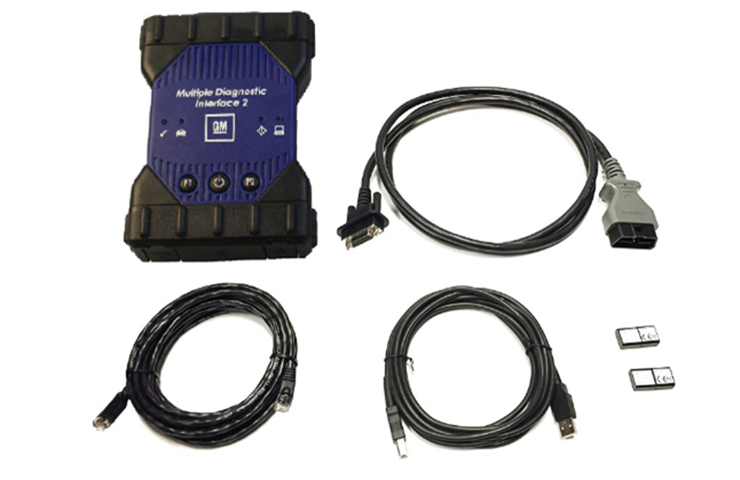 Fig. 1
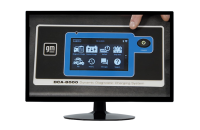
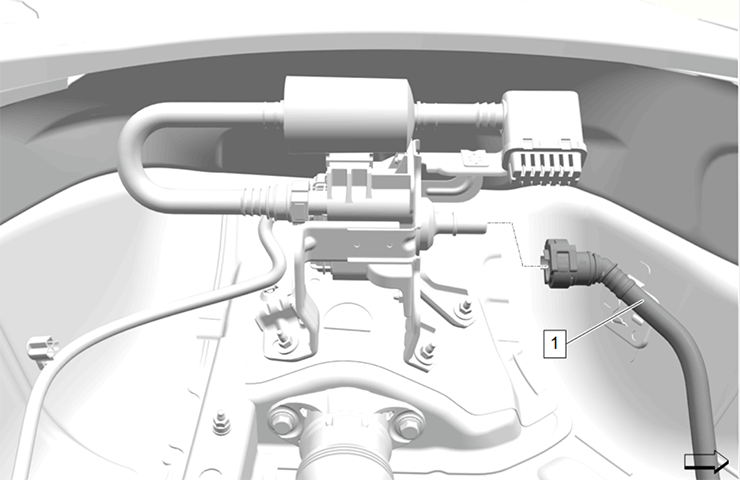
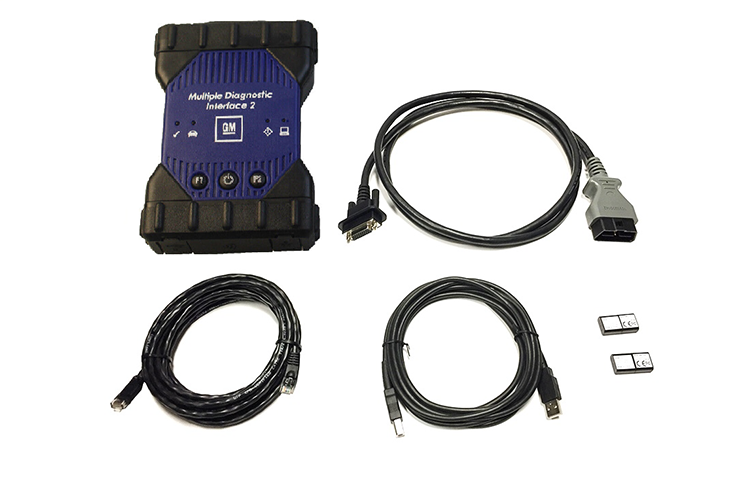
Connectors on the MDI 2 include: (Fig. 2)
- USB Ports – Connects to a single PC running the MDI Manager software and allows configuration of LAN or WLAN settings required by the dealership local network. USB connection must be made directly with the PC port. Do not connect through a USB hub.
- Wireless Adapter Port – Allows for a wireless adapter to be inserted to enable the use of a WLAN or Point-to-Point wireless.
- Ethernet Port – Enables the use of an ethernet cable.
 Fig. 2
Depending on the configuration setup for wired or wireless communication, it may be necessary to change some of the settings and options on the MDI 2 or PC.
LAN Switching in BIOS
LAN Switching is a feature in Windows used to define how network interface adapters (ethernet or wireless) are to operate. Disabling this setting in BIOS tells the PC not to disable one network (ethernet or wireless) when another network is detected. (Fig. 3) Using the internet browser, search your PC Make and Model for the function key to enter BIOS during the PC boot.
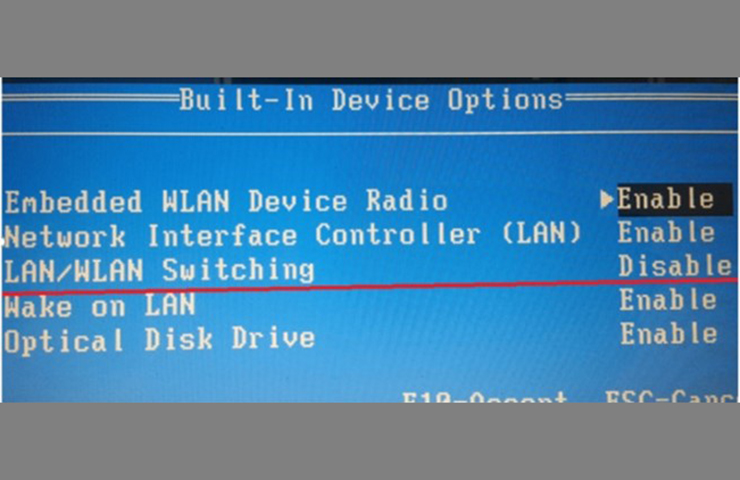 Fig. 3
LAN Switching at Adapter Interface
On some PCs, LAN switching at the wireless adapter may be disabled in Windows. (Fig. 4) This feature may not be available on all adapters.
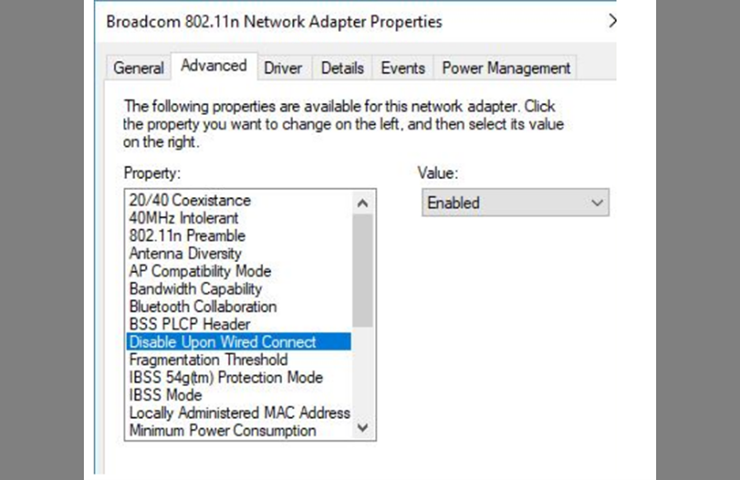 Fig. 4
PC Sleep Setting
It is very important to change the default Power Management option for your interface to the MDI 2. (Fig. 5) With the proper setup, if a test takes longer to execute than the PC Power and Sleep Option configuration, your interface adapter will not be allowed to sleep.
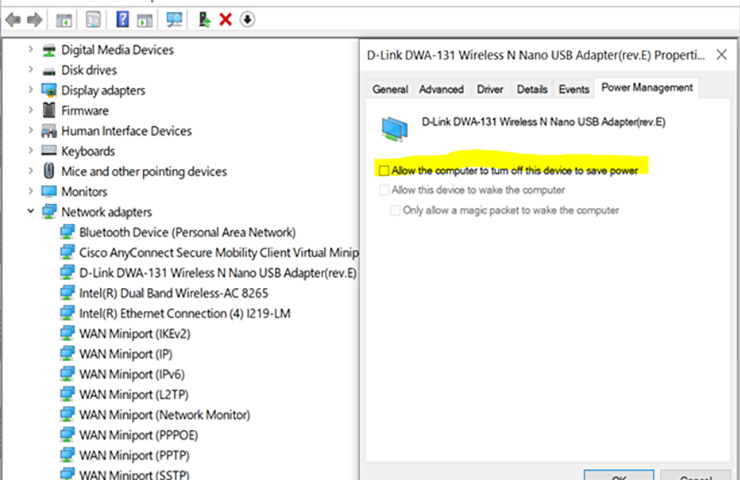 Fig. 5
For additional information on setup of the MDI 2 using the MDI Manager, refer to the MDI 2 User Manual or contact the Techline Customer Support Center (TCSC).
MDI Manager Configuration
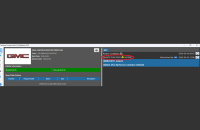
The MDI Manager application is used only for MDI configuration, firmware updates and enabling functionality. (Fig. 6) Connection to a device from the MDI Manager does not use SAE J2534.
Device status is shown under the MDI 2 icon and indicates the required step to perform first before connecting to a device.
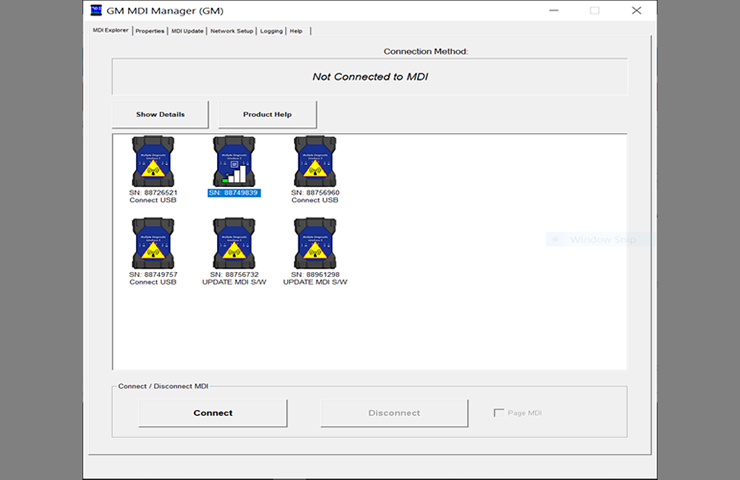 Fig. 6
The MDI 2 can be configured to use USB, ethernet and wireless connections. USB and Point-to-Point wireless modes are pre-configured as the default. The easiest way to configure the Ethernet (RJ45) configuration for the MDI 2 is via a Link Local IP address. Other ways involve using a USB-to-Ethernet adapter or a local Hub.
A yellow icon indicates that pairing is required for a Point-to-Point connection. A wireless configuration via an Access Point (AP) requires that the 802.11 b,g,n AP SSID is visible and set up with WPA2 security.
Ethernet Interface using a Link Local IP Address with MDI 2
This step assumes that your laptop is equipped with an RJ45 port.
The MDI Manager is used to configure the interfaces to the MDI 2. There are three mediums for connecting with the device: two wired (USB and RJ45) and one wireless in two modes – AP (Access Point) mode and P2P (Point-to-Point) mode.
For an ethernet connection using a static IP Link Local address, configure the MDI 2 with an IP address in the same range as 169.254.1.x with subnet 255.255.0.0. The IP of the CGM is 169.254.1.0, so the address can be anything in the 1-254 range for the last octet.
Wired Ethernet Connection using a Link Local IP Address with MDI 2
In this configuration the steps below illustrate how to assign a static link local address for the MDI 2. This setup procedure allows a secondary (USB connection is auto configured) wired interface to the MDI 2
To configure an Ethernet Link Local IP Address for MDI 2:
- Plug the USB cable into the PC and the MDI 2.
- Plug in an RJ45 cable between the MDI 2 and the PC.
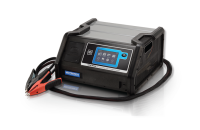
- Apply 12 volts to the MDI 2 via the self-test adapter or by connecting to the vehicle Data Link Connector to power the MDI 2
- Start the MDI Manager software by clicking the MDI Manager icon.
- On the MDI Explorer tab, select the MDI 2 and click the Connect button. A check mark appears over the MDI 2 icon to indicate that the connection has been made (connection by default is over USB.)
- Select the Network Setup tab.
- Select the Wired Ethernet tab.
- Select the Enable Wired Ethernet Interface from the MDI 2 Manager check box in the Interface Control box to enable the interface. Once the interface is enabled, the IP Address Configuration box and the Apply and Cancel buttons become active. Enter 169.254.1.x(1-254) as the IP address for the MDI 2 and 255.255.0.0 for the Mask. The GM CGM ECU has a default link local IP address of 169.254.1.0.
- The MDI Manager software will store the changes made for each interface. Select the Apply button to save the changes.
- Follow the Configuring a Static IP Link Local Address for PC Ethernet Adapter steps below to configure the PC Ethernet Adapter.
- Remove the USB cable and leave the Ethernet cable connected to the MDI 2 and PC.
- Verify the configuration is successful.
- Disconnect from device and remove USB cable only. (Fig. 7)
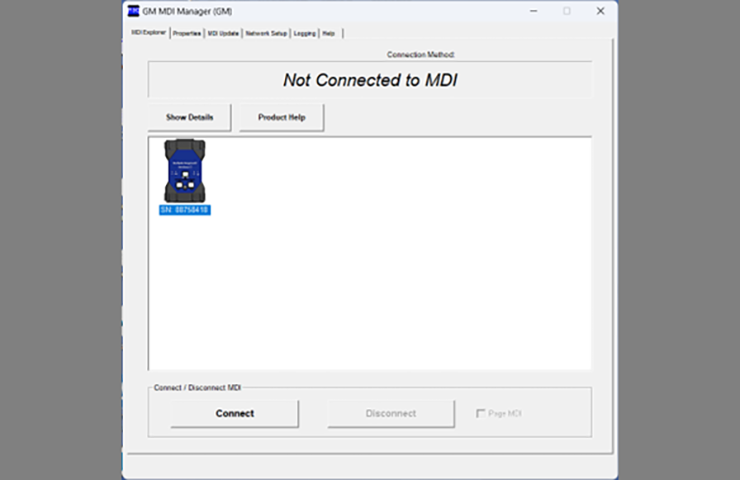 Fig. 7
- Reconnect from MDI Manager over Ethernet now to verify configuration is complete. (Fig. 8)
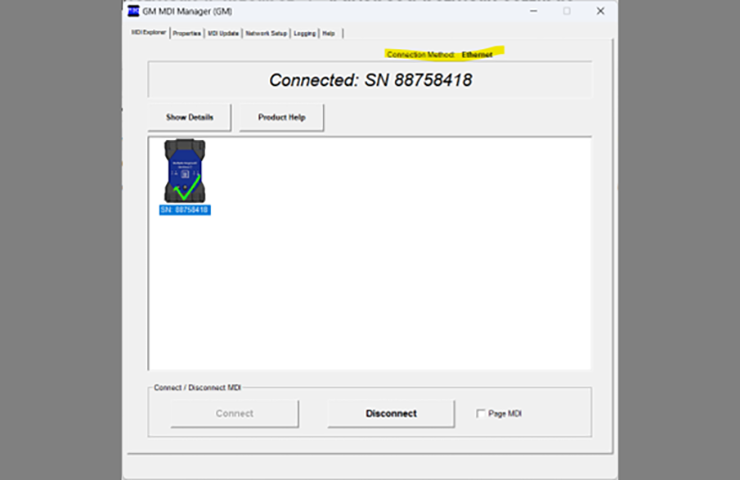 Fig. 8
TIP: Your PC to the network/internet must be via the wireless interface and the PC to MDI 2 connection via the Ethernet ports on both the PC and MDI 2 via a RJ45 cable. If the laptop does not have an ethernet port, a USB-Ethernet adapter can be configured in the same way as the onboard PC ethernet board to use link local IP address.
Configuring a Static IP Link Local Address for PC Ethernet Adapter
Follow the steps below to assign a link local IP address for your ethernet adapter.
- Select Network and Sharing Center. (Fig. 9)
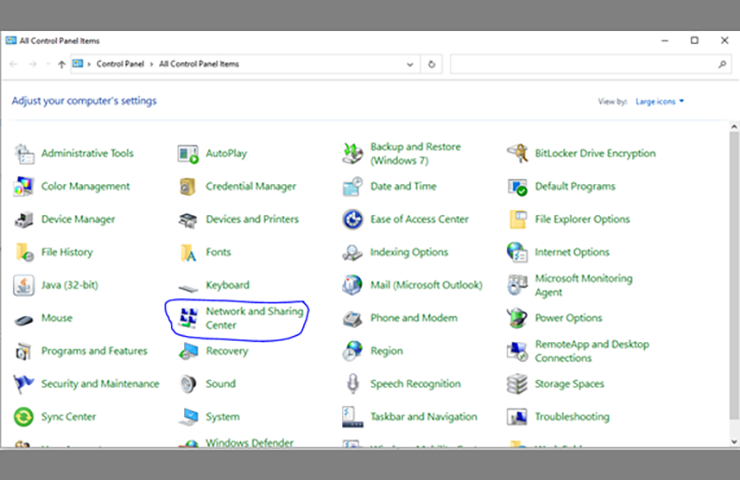 Fig. 9
- Select Change adapter settings. (Fig. 10)
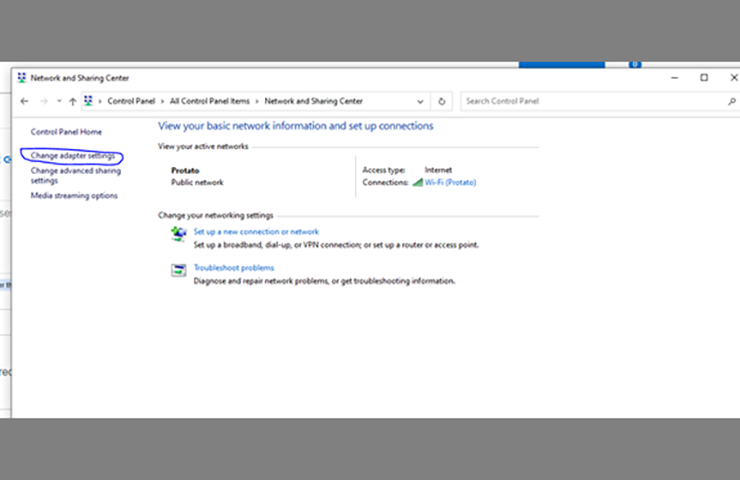 Fig. 10
- Under Ethernet, select Properties. (Fig. 11)
 Fig. 11
- Select Internet Protocol Version 4. (Fig. 12)
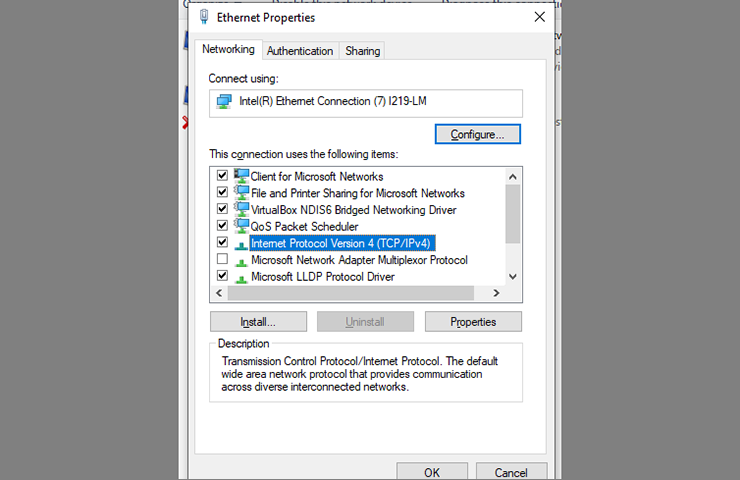 Fig. 12
- Select OK to save the new settings.
For additional information on setup of the MDI 2 using the MDI Manager, refer to the MDI 2 User Manual available in Service Information or contact the Techline Customer Support Center (TCSC) at 1-800-828-6860 (English) or 1-800-503-3222 (French).
– Thanks to Chris Henley


LOOKING TO PURCHASE ADITIONAL MDI 2. WHERE CAN I GO TO PURCHASE? THANKS.
Two D-Link dwa-131’s. one in pc usb and one in the mdi2.
The MDI 2 comes with a wireless dongle. Replacements can be purchased through Dealer Equipment. For SPS programming, hard wired Ethernet or wired USB is recommended.
What are the wireless adapters needed for wireless use?