
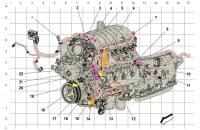
The GM Accessory Assist Steps available on 2014-2019 Silverado, Sierra; and 2015-2019 Tahoe, Suburban, Yukon, Colorado and Canyon models help make it easier to get in and out of the vehicle. Installation of the Assist Steps requires using the included brackets and mounting hardware and securing to the vehicle underbody. (Fig. 14) Here are a few tips to ensure a successful installation.
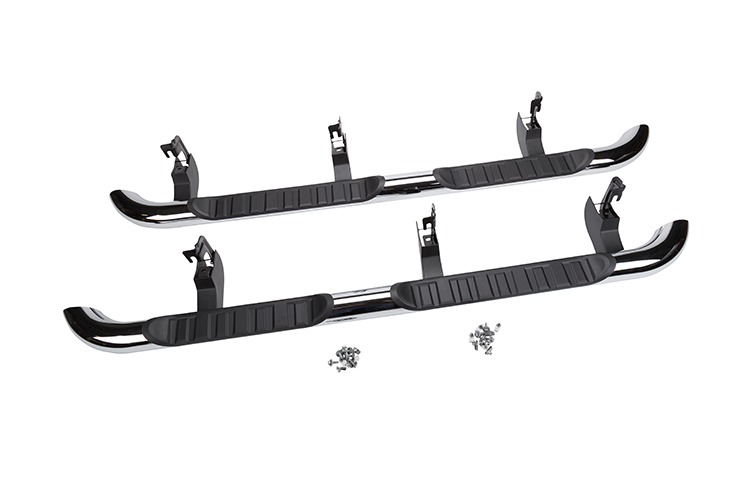 Fig. 14
Torque Fasteners
One of the keys to successful installation of the Assist Steps is verifying fastener torque to the proper specification. Warranty claims for the Assist Steps being loose or a noise heard during vehicle operation often will identify that the bracket bolts were not tightened properly or that the brackets were not properly aligned during installation.
Use the correct fastener in the correct location and ensure that all fasteners are properly torqued to specification. There are a different number of bolts for installation on gasoline and diesel vehicles as well as regular and extended cab or crew cab models.
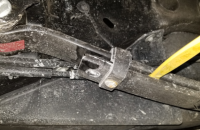
If power tools are used, it’s recommended to verify the proper torque of the fasteners with a torque wrench. (Fig. 15)
 Fig. 15
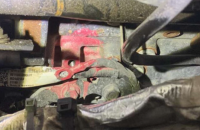
It also may be helpful to paint mark M8 bolts to make it easier to visually check that they are properly secured. (Fig. 16)
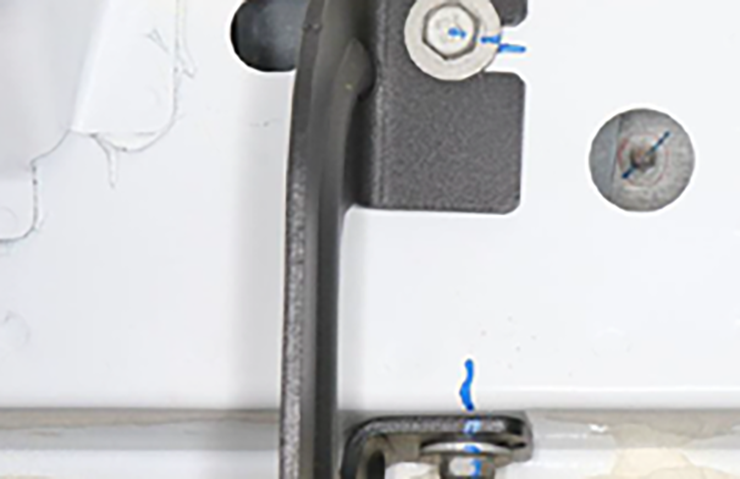 Fig. 16
If an Assist Step was installed at your dealership, the repair for a loose step is not an acceptable warranty repair.
Diesel Models
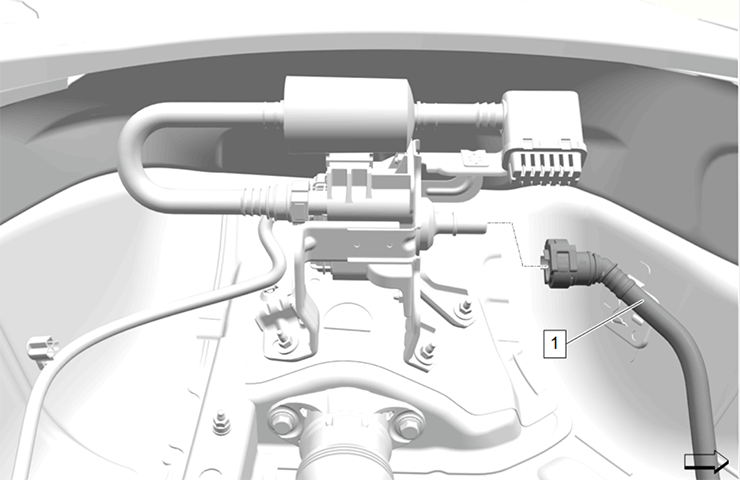
Installation of some Assist Steps may be more difficult on vehicles with a diesel engine due to the location of the Diesel Exhaust Fluid (DEF) tank.
To assist in the installation of the bracket near the DEF tank, it may be helpful to install and torque the bracket retaining bolt and then remove the bolt. The bracket should be remain in place while securing the Assist Step. (Fig. 17)
 Fig. 17
For a look at the installation, view the August 2017 Emerging Issues seminar (10217.08V). In Canada, view the September 2017 edition of TAC Talk
Bracket Installation
When installing the brackets for the Assist Steps, secure the vertical fasteners first. It may help to finger-start the horizontal fasteners and hang the Assist Steps on them during the installation procedure, but the vertical fasteners should be secured first.
Begin installation with the forward-most bracket first followed by the rear bracket. The remaining brackets will then be easier to align while keeping the Assist Step properly positioned. For example, crew cab trucks use four brackets per side, so secure the #1 (front) and #4 (rear) brackets first, and then brackets #2 and #3.
For complete instructions and specifications for the accessory item being installed, always refer to the installation instructions in the Accessories manual in the appropriate Service Information.
– Thanks to Assist Step Team


