
2013-2019 ATS models equipped with the 2.0L 4-cylinder engine (RPO LTG) or 2.5L 4-cylinder engine (RPO LCV) may have a crank, no start condition with an intermittent Check Engine MIL illuminated. Some of the following DTCs may be set: P0014, P0013, P0017, P0192, P0236, P0237, P0335, P0336, P0340, P0341, P0365, P0366, P0420, P0452, P0641, P2123, P2138, P2227, P2228, and/or P2618.
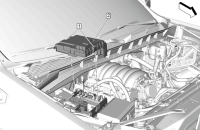
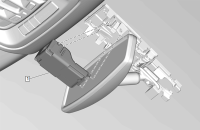
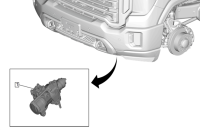
If these conditions are found, check the Engine Control Module (ECM) for any corrosion. (Fig. 16)
 Fig. 16
Disconnect all three ECM connectors – X1, X2 and X3 – from the ECM and remove the terminal guide (Fig. 17) from each connector so all the metal terminals can be seen.
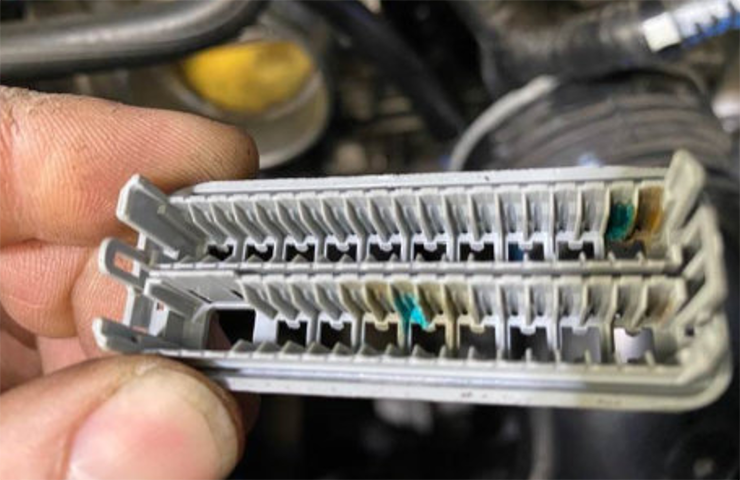 Fig. 17
Use a bright light to inspect all the terminals in all three connectors for green corrosion, coolant or oil. Inspect all terminals regardless which DTCs may have set. Every terminal must be inspected since circuits that are corroded or contaminated can back feed into other circuits that are not corroded and set DTCs for associated systems.
Corroded Terminals
Any terminal that has signs of green corrosion should be replaced with terminated leads. Do not clean the terminals. The contact area is difficult to clean and will lead to poor connections and intermittent DTCs. Solder all terminated leads and cover with shrink tubing. Do not use crimp connectors to splice the circuits together.
If the ECM terminals inside the ECM socket are corroded, the ECM must be replaced.
Connectors Contaminated with Coolant
If coolant is seen in any ECM connector, check if the engine coolant temperature sensor circuits are in that connector. If the circuits are in the connector, unplug the engine coolant temperature sensor connector and inspect it for signs of coolant.
If there is evidence of coolant, replace the engine coolant temperature sensor, the engine coolant temperature sensor connector, all associated circuits and terminated leads all the way into the ECM connector. Solder all terminated leads and cover with shrink tubing. Do not use crimp connectors to splice the circuits together.
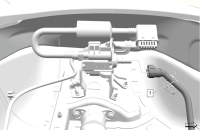
If the coolant source is not from the coolant wicking up the engine coolant temperature circuits and into the ECM, inspect the coolant reservoir and “Y” hose located above the ECM for leaks. (Fig. 18) Replace the reservoir or “Y” hose as needed.
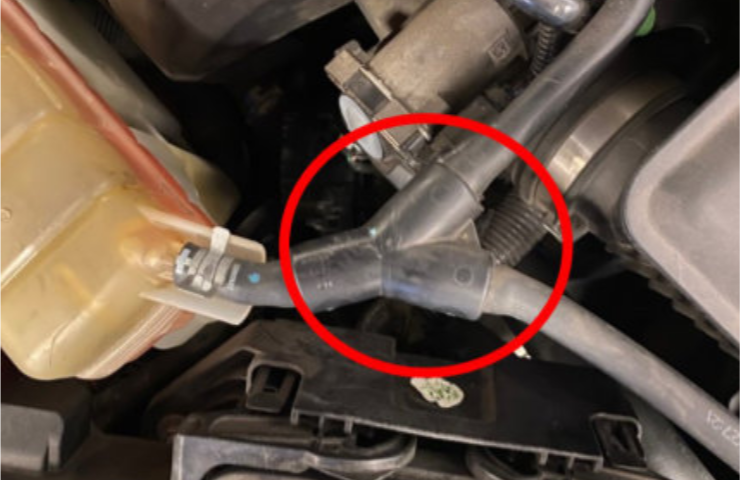 Fig. 18
If the coolant was leaking down onto the ECM from the reservoir or “Y” hose, the ECM may have to be replaced, depending if coolant saturated the ECM and ECM sockets. Shake the ECM and listen for any coolant sloshing inside the ECM. Replace the ECM if coolant is heard inside the ECM. If coolant is only in the ECM socket, clean the ECM sockets with electrical contact cleaner and blow out with compressed air.
Connectors Contaminated with Engine Oil
If there is engine oil seen in any ECM connector, check if the engine oil pressure sensor circuits are in that connector. If the circuits are in the connector, unplug the engine oil pressure sensor connector and inspect it for signs of engine oil.
If there are signs of engine oil, replace the engine oil pressure sensor, the engine oil pressure sensor connector, all the associated circuits and terminated leads all the way into the ECM connector. Solder all terminated leads and cover with shrink tubing. Do not use crimp connectors to splice the circuits together.
Inspect the ECM connector socket for oil contamination. If there oil is found, use electrical contact cleaner and compressed air to clean the socket. If the ECM socket is saturated with engine oil and it is suspected that oil has entered the ECM, replace the ECM.
For additional information, refer to #PIP5790.
– Thanks to David Rutkowski


