
Several engine wiring harness chafing conditions may be found on some 2019-2021 Silverado and Sierra models as well as some 2021 Tahoe, Suburban, Yukon and Escalade models. Depending on the extent of the harness chafing for the engine application, the Check Engine MIL may be illuminated along with a possible no start or no crank condition or other performance conditions, several blown fuses, or a number of DTCs set.
Here’s a summary of some of the engine wiring harness conditions that may be found. Refer to Bulletin #21-NA-149 for complete details.
2.7L Engine
The engine wiring harness on the 2.7L engine (RPO L3B) on some 2019-2021 Silverado and Sierra models may contact several underhood components. Inspect the harness for any damage where it crosses over the top of the camshaft carrier cover. (Fig. 1)
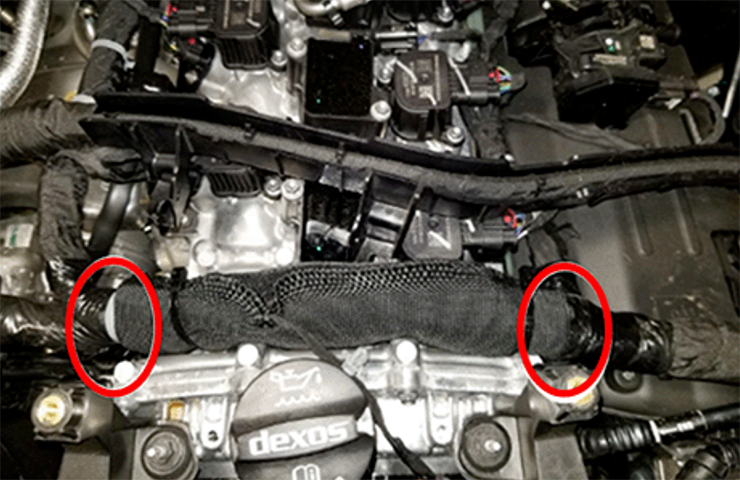 Fig. 1
In addition, inspect the engine harness at the lower air cleaner housing, the generator bracket and left-front coil spring stud, and the left-front upper control arm bushing.
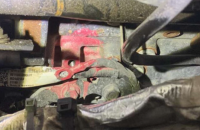
Under normal driving conditions, the engine will rock back-and-forth in its mounts, which may result in harness contact with the generator bracket that may not be present with the engine off. (Fig. 2) It may be necessary to disconnect several engine harness connections to reposition the harness for inspection.
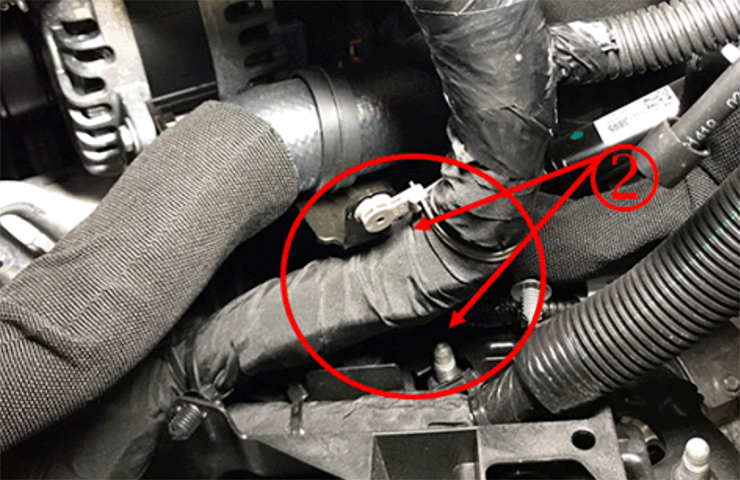 Fig. 2
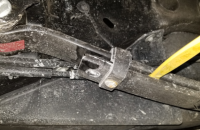
If engine wiring harness contact is isolated during the inspection, carefully inspect for internal wiring damage and repair any wiring as needed followed in the wiring repair procedures in the appropriate Service Information. Once the inspections or repairs have been made, protect the engine wiring harness from future damage using the appropriate Zip Tie Fir Tree Clip and/or Kevlar Velcro Sleeve. (Fig. 3)
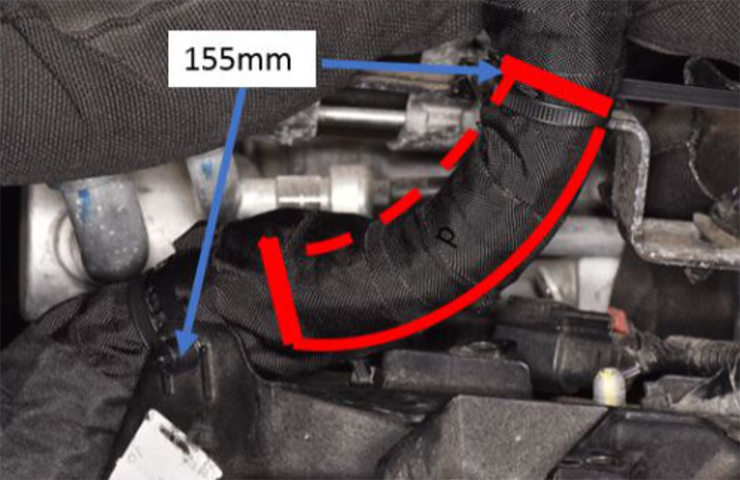 Fig. 3
4.3L Engine
On the 4.3L engine (RPO LV3) on some 2019-2021 Silverado and Sierra models, check the engine wiring harness for any rubbing on the front corner of the left cylinder head (Fig. 4) or drive belt idler bracket and shorting any number of circuits to ground. Due to the number of circuits in the harness, there may be a wide variety of different symptoms that may occur, depending on the circuit that is damaged.
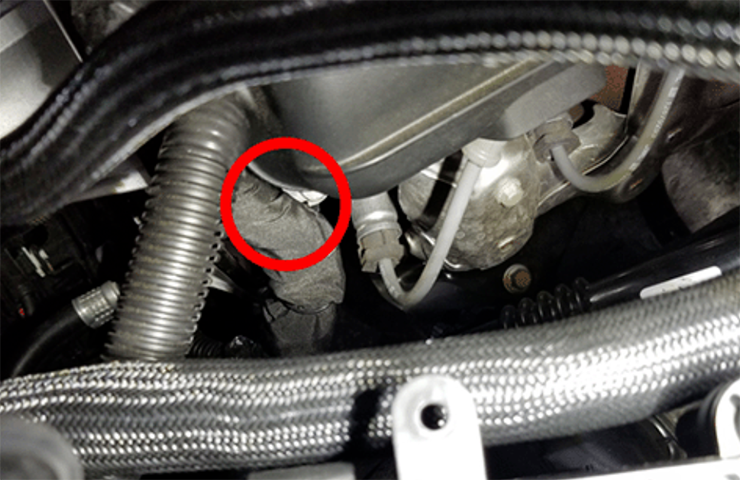 Fig. 4
Repair any damaged wiring found by following the wiring repair procedures in the appropriate Service Information. Once repairs are completed, protect and reposition the engine wiring harness to prevent future damage.
3.0L Diesel Engine
The 3.0L diesel engine (RPO LM2) on some 2019-2021 Silverado, Sierra; 2021 Tahoe, Suburban, Yukon and Escalade models may have a pinched or chafed wiring harness at approximately 18 inches (46 cm) from the ECM connectors and on top of the generator, or at the PVC hose clamp at the crankcase pressure regulator that is approximately 4 inches (10 cm) from the crankcase sensor connector pigtail harness breakout. (Fig. 5)
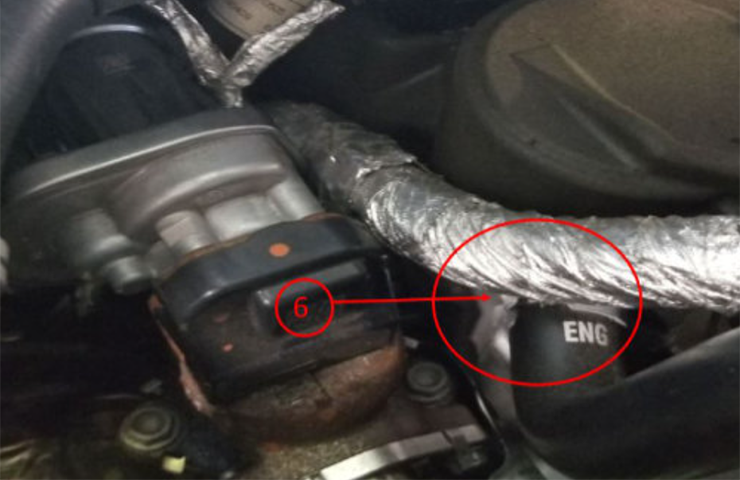 Fig. 5
There may be a number of different symptoms that may be present, depending on the damaged circuit.
If DTCs P0201, P0202, P0203, P0204, P0205, P0206, and/or P0216 are set, inspect for poor terminal tension at connector X160 and that the terminal locking feature is not missing. Also inspect the fuel injector connectors to make sure they are fully connected/seated and for damage to the fuel injector wiring harness near the X160 connector. (Fig. 6)
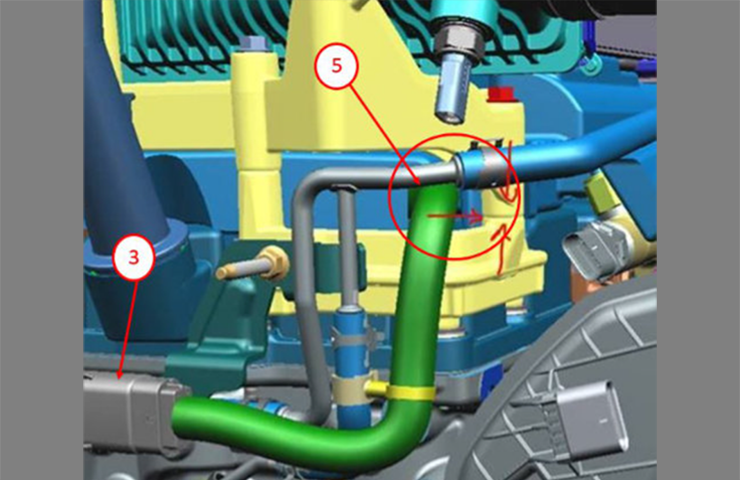 Fig. 6
Do not replace ECM for these concerns without thoroughly inspecting the engine wiring harness. If any concerns are found, follow the wiring repair procedures in the appropriate Service Information
2.7L Engine, 3.0L Diesel Engine, 4.3L Engine, 5.3L Engine and 6.2L Engine
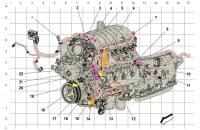
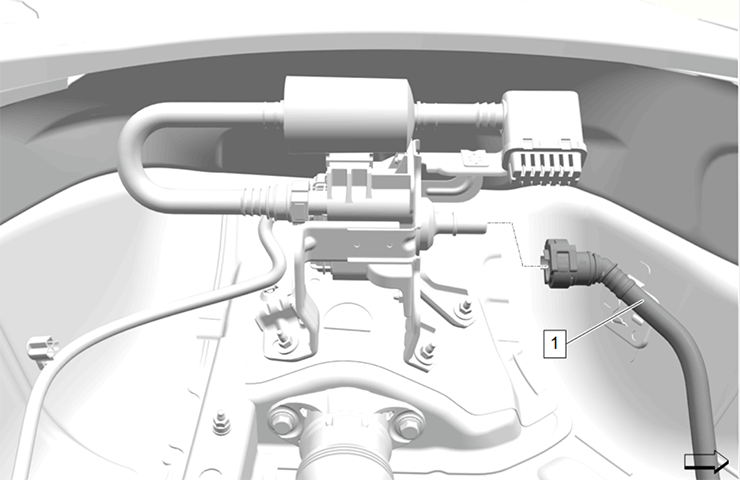
The engine wiring harness on the 2.7L engine (RPO L3B), 3.0L diesel engine (RPO LM2), 4.3L engine (RPO LV3), 5.3L engine (RPO L82, L84) and 6.2L engine (RPO L87) may be contacting the ECM/TCM bracket (Fig. 7, #1), driver-side upper control arm (Fig. 7, #2) and/or the shock tower bolt (Fig. 7, #3) due to engine vibration. Harness sleeves, anti-abrasion tape and zip ties should be used to secure the harness from these contact points.
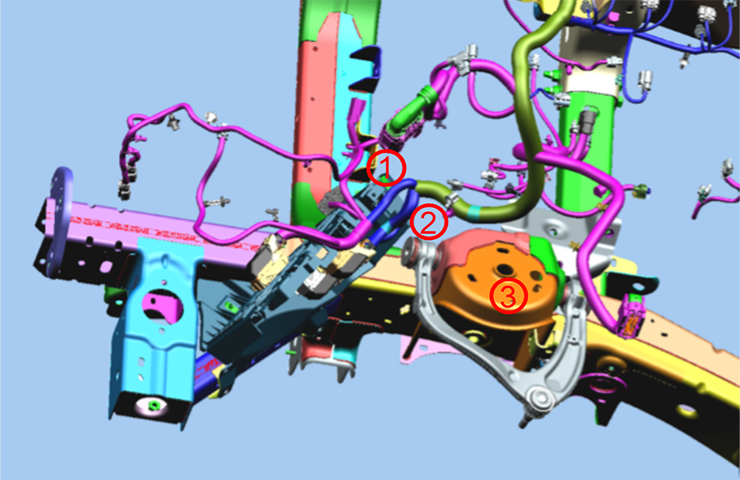 Fig. 7
At the ECM/TCM bracket, wrap the harness using a harness sleeve and secure with zip ties to prevent movement.
For upper control arm contact, wrap the wiring harness in the harness sleeve and anti-abrasion tape. Secure the harness to the harness clip above the ECM/TCM bracket.
At the shock tower, there is a wire harness canal where the harness should be positioned. Insert the harness sleeve and secure the harness to the canal using zip ties.
Verify the wiring harness is secure at all three points. (Fig. 8)
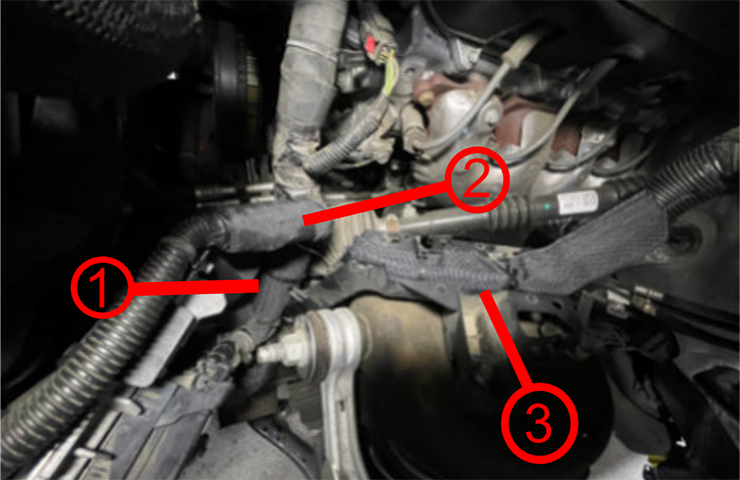 Fig. 8
For additional information about the repair procedures and the required part numbers, refer to Bulletin #21-NA-149.
– Thanks to Dave MacGillis


Same issues 2022 2.7