
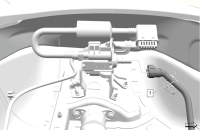
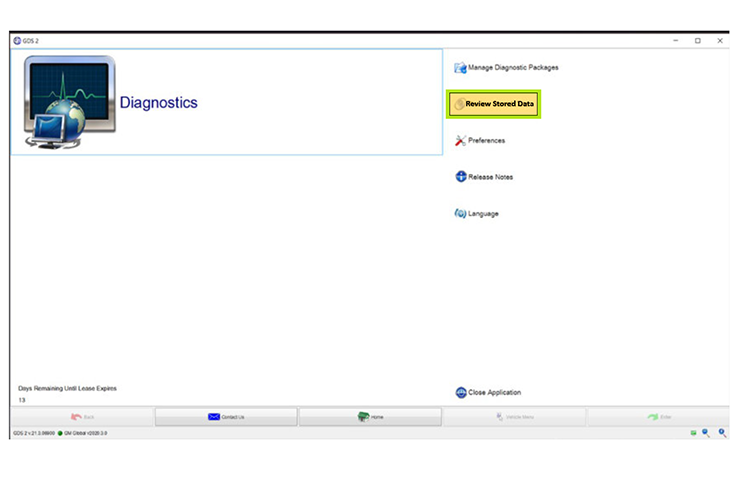
The green, blue and red charging status indicators (Fig. 2) on new GM electric vehicles (EVs), including the 2023-2024 LYRIQ; 2024 Blazer EV, Equinox EV and Silverado EV, can quickly show owners if their vehicle is properly connected to a charging cord and if the vehicle is charging. Understanding each of these indicators will help owners quickly identify the current state of charging, and help technicians when working with EVs or diagnosing any charging concerns.
The three colors of the charging status indicators provide a quick visual identifier of the charging status.
- Green – Power is flowing.
- Blue – Power is not flowing.
- Red – Action is required.
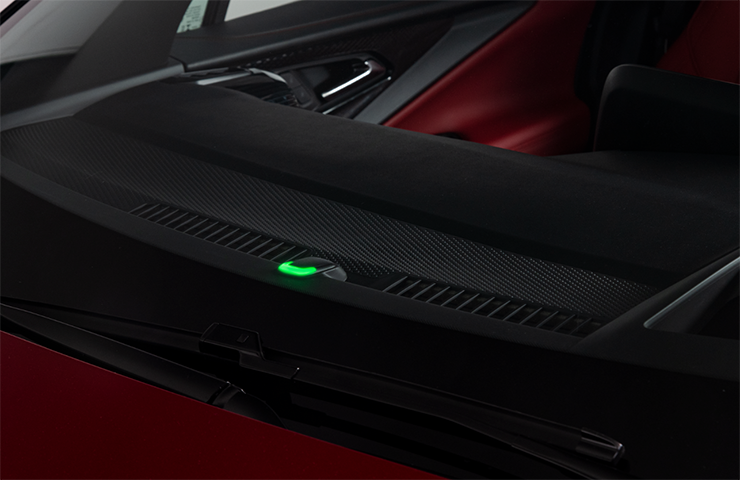 Fig. 2
Set the Target Charge Level
Be sure customers understand how their vehicle is set up to charge, including charging limits, delayed charging times and other settings. (Fig. 3) Touch the Charging icon on the infotainment screen to open the Charging app. Options include Next Charge, Charge Assist, Schedule, and Settings, all of which provide additional information and various settings for charging immediately as well as scheduling future charging sessions.
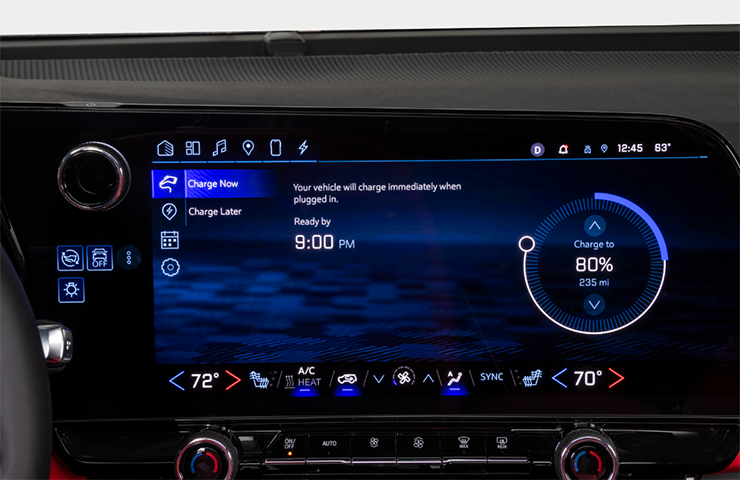 Fig. 3
TIP: Charging times for each individual EV will vary based on the battery condition, charge level and outside ambient temperature. It is normal to hear fans, pumps and electrical devices clicking when the vehicle is turned off and charging.
The target charge level sets the maximum level the battery will charge to when plugged in. It will be set to 80% from the factory when the vehicle is new. It’s important to charge the propulsion battery to 80% for daily use to promote battery health and maximize regenerative braking performance, which helps increase efficiency. For longer trips, charging can be adjusted above 80% for extended range. Adjust charging back to 80% when additional charging is no longer needed.
Charging Status
The charging status indicator on the top of the instrument panel (if equipped) and the charging port light shows the current charging status of the vehicle using green, blue and red indicators that will pulse (long flash), blink (short flash) or stay illuminated (solid). (Fig. 4) Several tones also sound to indicate status.
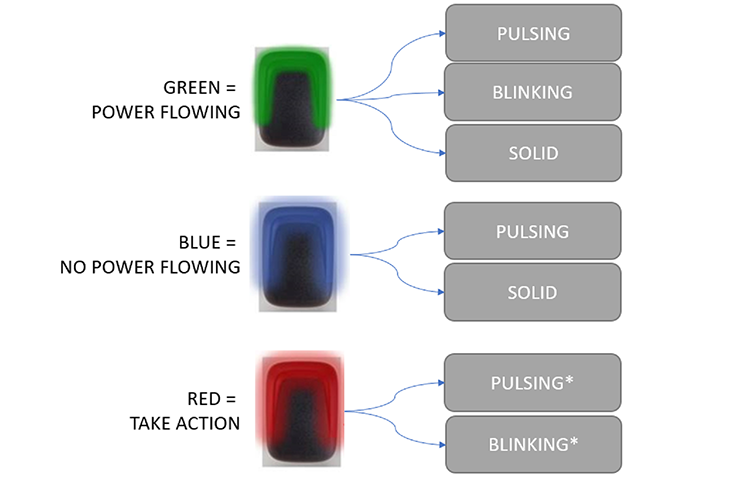 Fig. 4
Solid Blue– Successful initial plug-in connection.
Flashing Green and Single Tone – Vehicle is plugged in; battery is charging. Flashes indicate current percentage of battery charge. As the vehicle charges, the flashes will be longer (the light will illuminate longer), indicating a higher state of charge.
Consistent pulsing green indicates the vehicle is discharging energy (e.g. Vehicle to Home). Four tones may sound when the discharge session is near completion based on remaining battery percentage.
Flashing Blue with Double Tone – Vehicle is plugged in; battery charging is delayed based on the programmed charging schedule.
If the amount of time needed to complete charging for the programmed Charge Later setting is not sufficient or there are Preferred Charging settings, the vehicle may start charging immediately. Under these conditions, the indicator will flash green and four tones will sound.
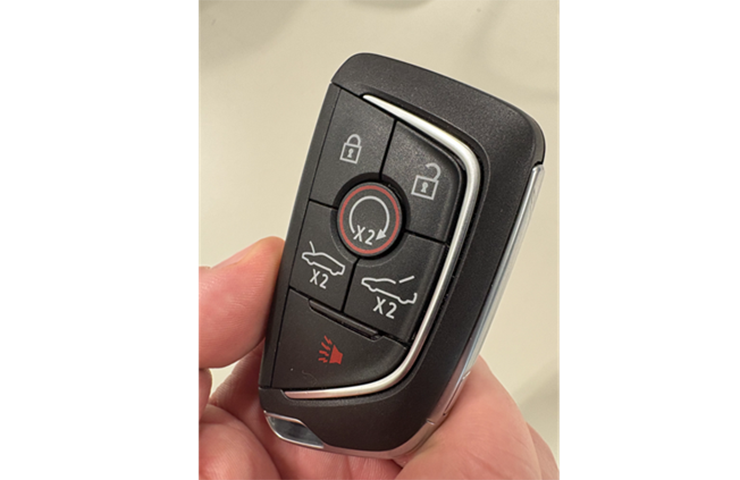
Solid Green – Vehicle is plugged in; charging complete. The solid green indicator will turn off after a certain amount of time. Pressing the Unlock button on the key fob or opening a door will illuminate the indicator again.
Flashing Red – Vehicle is plugged in; not charging. Check the charge cord connection. It is normal for a red indicator to appear when disconnecting the charge cord during DC Fast Charging.
No Light – Vehicle is not plugged in OR there is an issue with the charger or outlet. Check the charge cord connection. Four tones may sound.
No Light and Three Tones – The charge port door is open.
Charging Basics
With the vehicle in Park, select the Charging icon to review the selected charge mode and charge cord limit. If a home charge location is not set, the charge level selection returns to the 8-amp setting each time the vehicle is driven.
When charging immediately, the charging status indicator will initially flash blue when the charge cord is connected and then flash green and sound a single tone when charging begins. If the charging status indicator flashes red, check the charge cord connection and power supply.
While the vehicle is plugged in, the “peek-in” screen on the instrument cluster provides a quick look at the current state of charge and estimated time to reach target charge level. (Fig. 5)
 Fig. 5
TIP: The vehicle may not always sound a tone or chirp sound, depending on the vehicle settings. To change the vehicle chirp settings, go to Charging > Settings on the infotainment screen.
To temporarily override a delayed charging event, remove and reconnect the charge cord to the vehicle within 5 seconds. It will begin charging immediately.
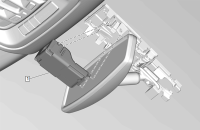
Charge Cord Indicators
After plugging in the charge cord (Fig. 6) to an appropriate electrical outlet, it will perform a quick self-test. The amber, blue and red charge cord indicators will display the status of the charge cord. If the charge cord status indicators do not illuminate, check that the electrical outlet has power.
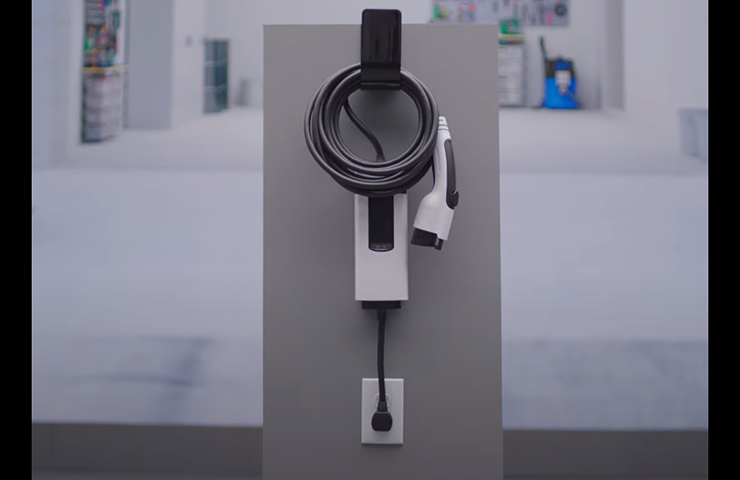 Fig. 6
Solid Blue – Charge cord is ready to use.
Flashing Blue – Vehicle is actively charging.
Solid Amber, Blue and Red – Error occurred; charge cord is rebooting. Wait for the cord to return to solid blue.
Solid Amber and Flashing Blue – Control box internal overheating. Charging rate is reduced. Move the charge cord away from direct sunlight and hot surfaces, such as asphalt paving.
Flashing Amber and Blue – AC plug or electrical outlet overheating. Charging rate is reduced. Disconnect the plug from the electrical outlet.
Solid Amber – Charge cord requires a reboot. Verify all components are connected properly and working correctly.
Flashing Red – Ground Fault Circuit Interruption (GFCI) fault. The charger will attempt to restart after 20 seconds.
Solid Red – Internal cord fault. Disconnect from the electrical outlet and vehicle.
Dual-Level Charge Cord
The included or available dual-level charge cord features 120-volt and 240-volt attachment plugs that can charge the vehicle at either Level 1 (120 volts) or Level 2 (240 volts) up to 32 amps. (Fig. 7) For 240-volt charging, a NEMA 14-50 outlet is required.
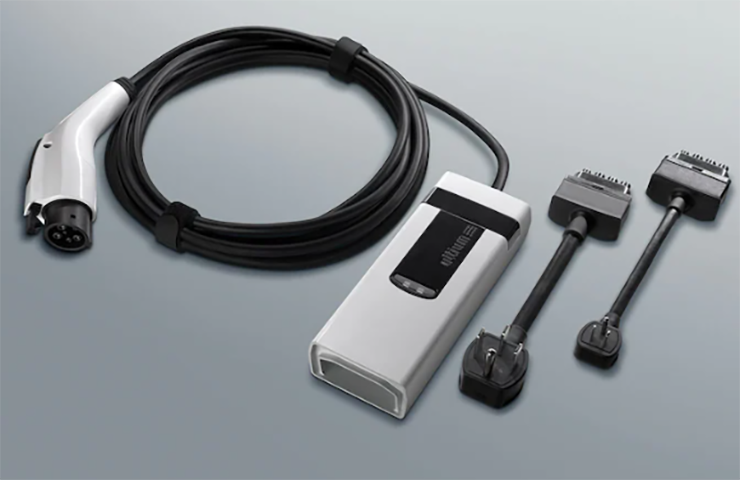 Fig. 7
To change attachment plugs for Level 1 or Level 2 charging, simply remove the plug from the control box and insert the desired plug.
When changing attachment plugs, make sure to fully insert the plug into the control box so that the connector is flush to the control box for proper operation. (Fig. 8) If the adapter is not fully seated in the control box, the charge cord will not operate.
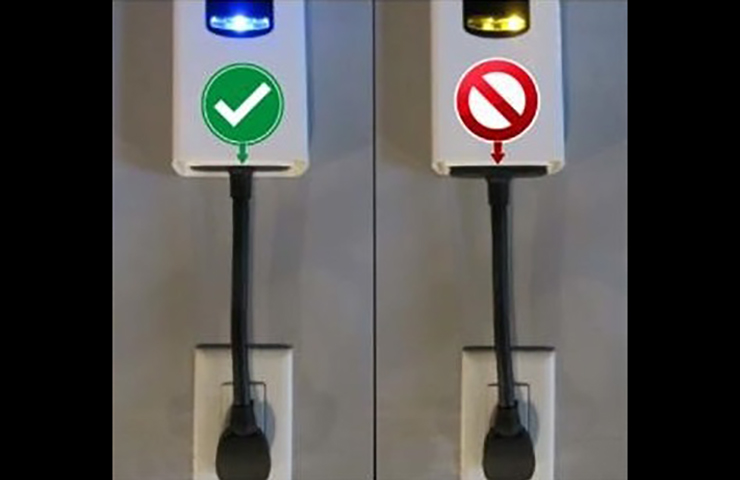 Fig. 8
DC Fast Charging and Preconditioning
DC Fast Charging, available at certain public charging stations, can provide faster charging of the vehicle’s battery. DC Fast Charging works best to quickly add miles of range to an EV when its charge is below 80%, and charging will slow after about 80%. Several factors impact how fast the vehicle charges, including (but not limited to) the charging station’s capability, current battery charge level, battery temperature and outside ambient temperature.
While driving to a DC Fast Charging station, it’s recommended to open the Charging Settings menu and select the DC Fast Charging Battery Conditioning setting. (Fig. 9) The battery conditioning setting will precondition the propulsion battery to optimize DC Fast Charging. Battery conditioning will reduce the current range of the vehicle but will help ensure optimal battery charging. If using Google Maps on the infotainment system, preconditioning may be enabled automatically when routed to a DC Fast Charging station, depending on vehicle settings and other conditions.
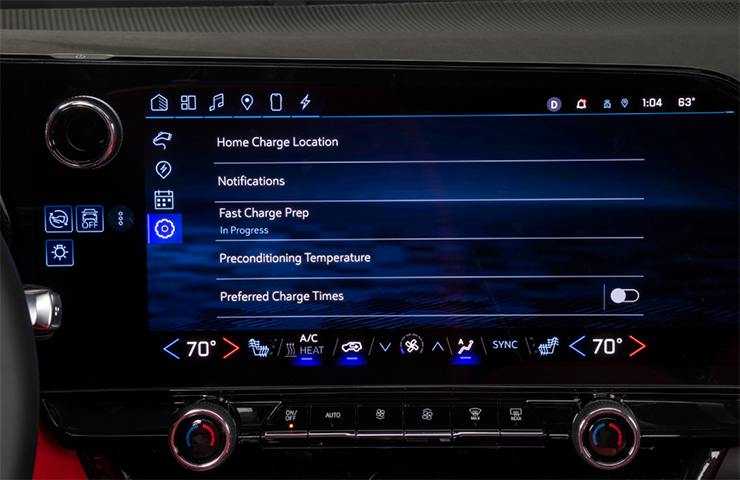 Fig. 9
– Thanks to Rick Miller


