
Several exhaust-related DTCs may be set in the Engine Control Module on some 2020-2021 CT4 and CT5 models equipped with the 2.7L engine (RPO L3B) or 3.0L engine (RPO LGY). These DTCs may include P31D4 (Exhaust Flow Control Valve – Position Signal Exceeds Upper Limit — Bank 1), P31DB (Exhaust Flow Control Valve Stuck Open — Bank 1), P31E2 (Exhaust Flow Control Valve – Position Signal Exceeds Upper Limit Bank 2), and/or P31E8 (Exhaust Flow Control Valve Stuck Open Bank 2).
If these DTCs are set, it may be due to older firmware or failure of the fail-safe spring within the exhaust control valve actuator. It will be necessary to replace both exhaust control valve actuators.
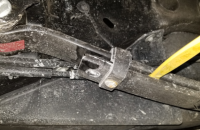
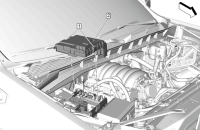
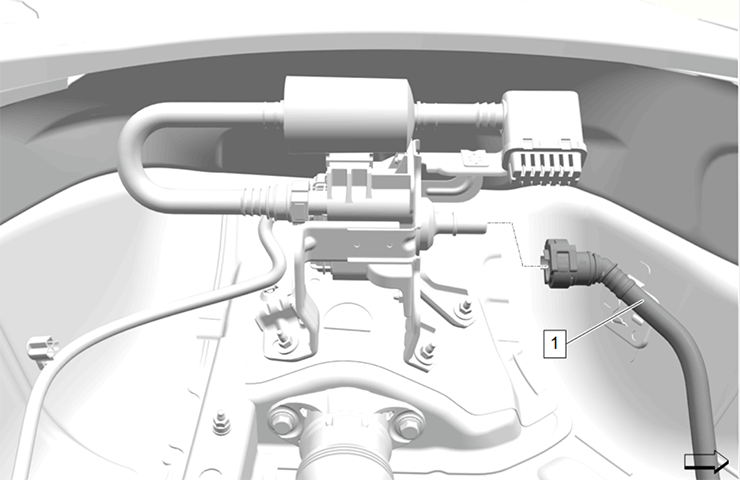
The exhaust tailpipe flow control system is used to tune the exhaust note for high-performance CT4 and CT5 models. (Fig. 1) The vehicle is equipped with two tailpipe exhaust valves installed in the low restriction exhaust path of a dual outlet muffler, near the exhaust tip. An output circuit from the Chassis Control Module is used to control the actuator that opens the left and right exhaust tailpipe valves. When a tailpipe exhaust valve is open, the low restriction exhaust path is opened to the atmosphere, and the exhaust note becomes more aggressive.
 Fig. 1
Actuator Installation
Prior to installing the exhaust control valve actuators, make sure the exhaust control valve actuator linkage is correctly installed on the actuator. Verify that the actuator is not connected or powered. Next, attach the linkage (or spring). It should be centered and fully seated. (Fig. 2, #1) The short tab (Fig. 2, #3) should be pointed away from the actuator motor. (Fig. 2, #2)
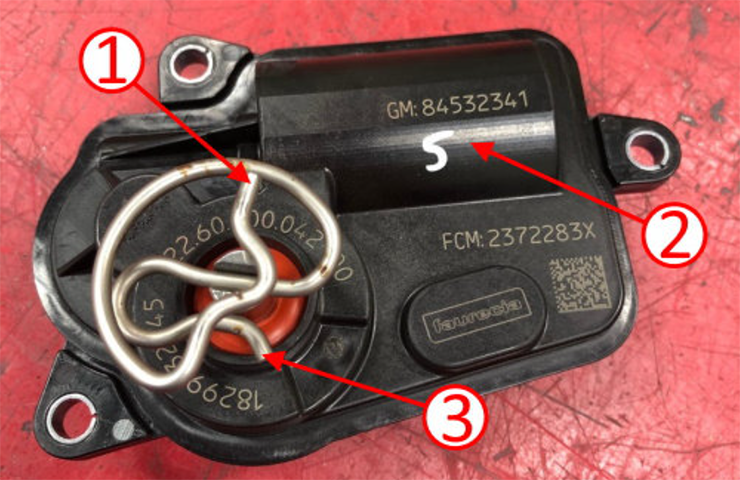 Fig. 2
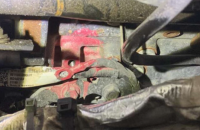
To install the exhaust control valve actuator, first manually turn the valve bearing on the exhaust side to its closed position. Note the turning direction – turn the right side valve bearing clockwise (Fig. 3, #2) and turn the left side valve bearing counterclockwise. (Fig. 3, #1) With the valve bearing in its closed position, place a small flat-head screwdriver or pick tool through the access hole to hold the valve fully closed. (Fig. 3, #3)
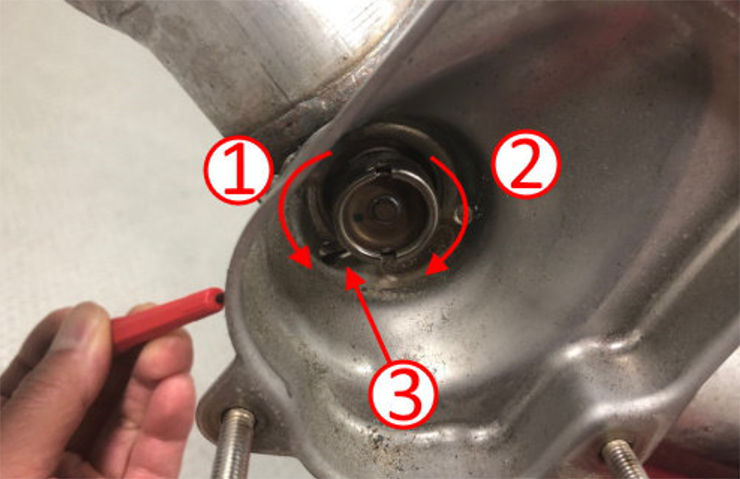 Fig. 3
Next, install the unpowered actuator as square as possible to the installation bolts. Once the actuator is installed and held in place, remove the screwdriver or pick.
Compress the actuator against the valve body while installing the three nuts. (Fig. 4) Tighten the fasteners to specification. The electrical connector can now be connected to the exhaust control valve actuator.
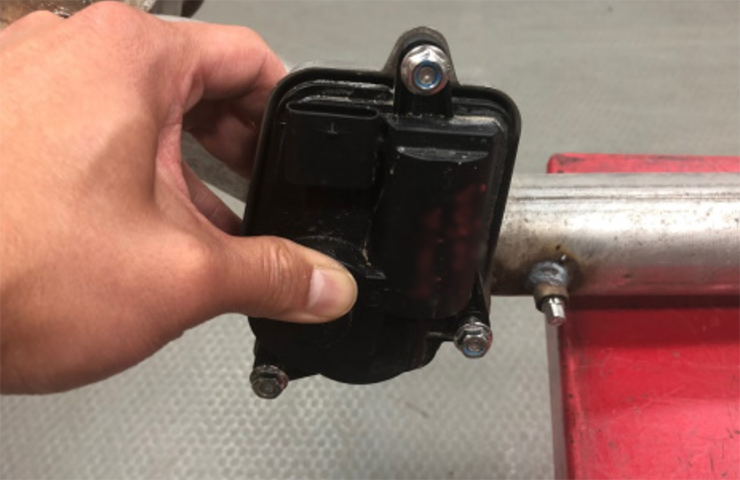 Fig. 4
Exhaust Control Valve Learn
On the 3.0L engine, program the exhaust control valve actuator by performing the Cylinder Deactivation Exhaust Control Valve Learn. Refer to the appropriate Service Information.
On the 2.7L engine, program the exhaust control valve actuator by performing the Exhaust Flow Control Valve Learn. Refer to the appropriate Service Information.
For additional information, including part numbers, refer to Bulletin #21-NA-130.
– Thanks to Bryan Salisbury


